Check In
Joe Naftal
Last Update 3 years ago
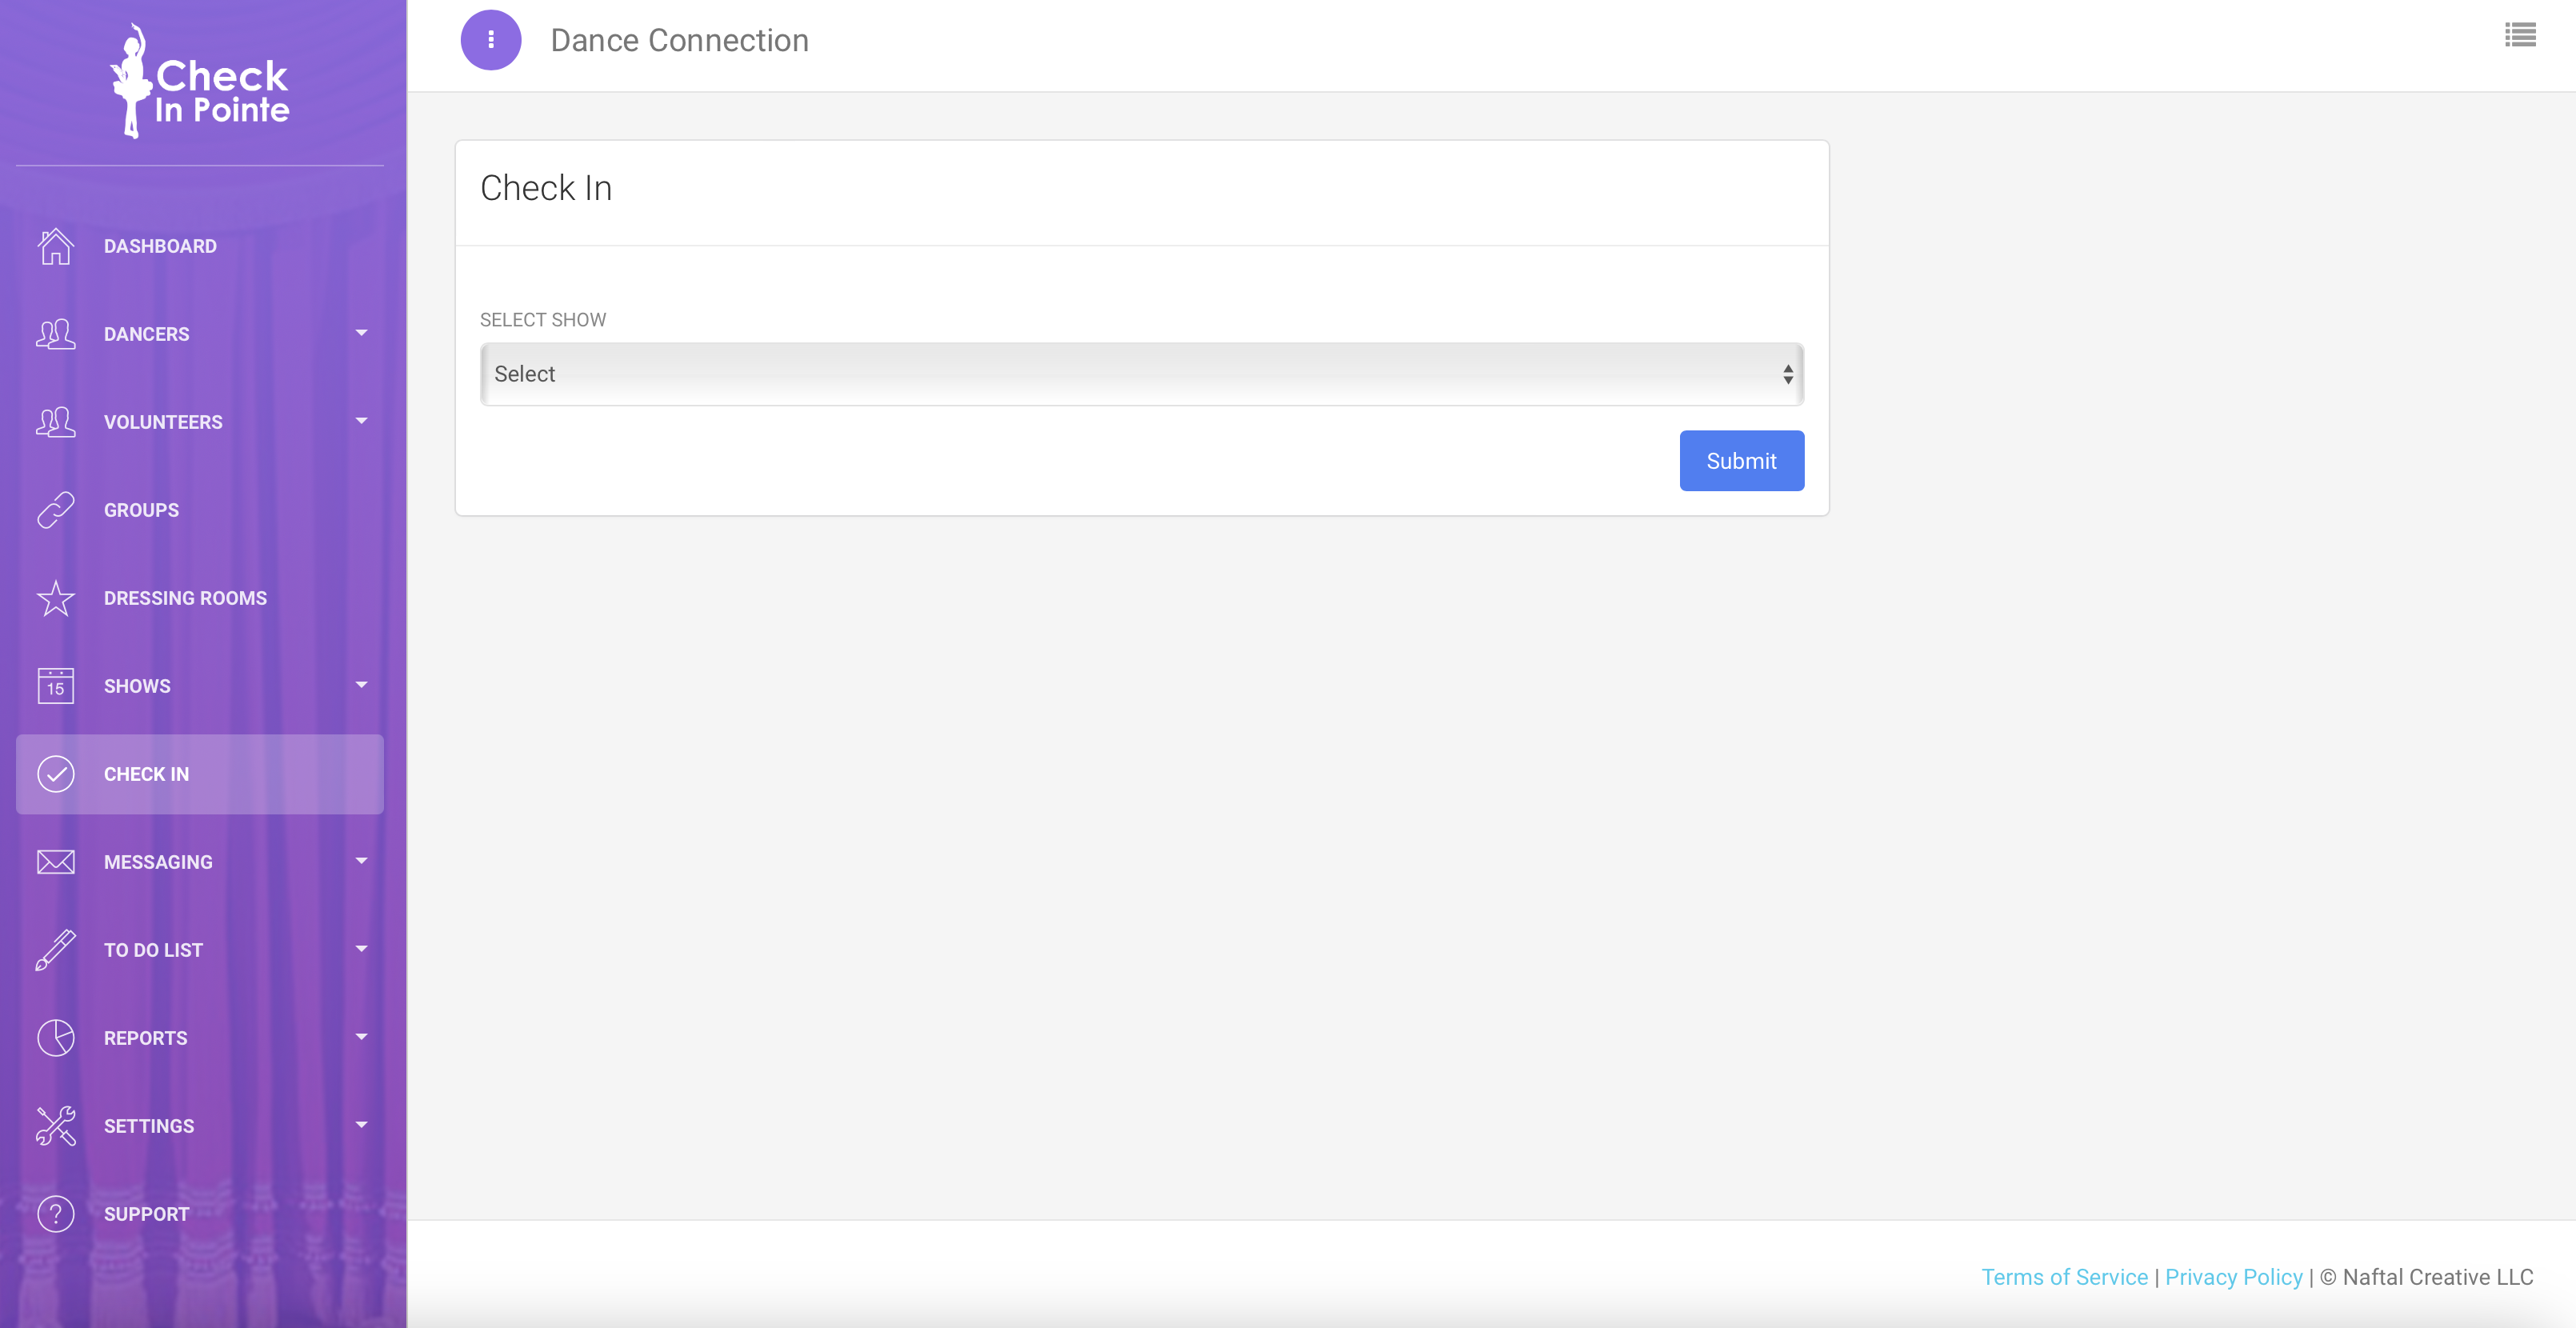
Enter Check In mode by clicking the Check In button in the sidebar. Select which show you wish to check in for and click Submit.

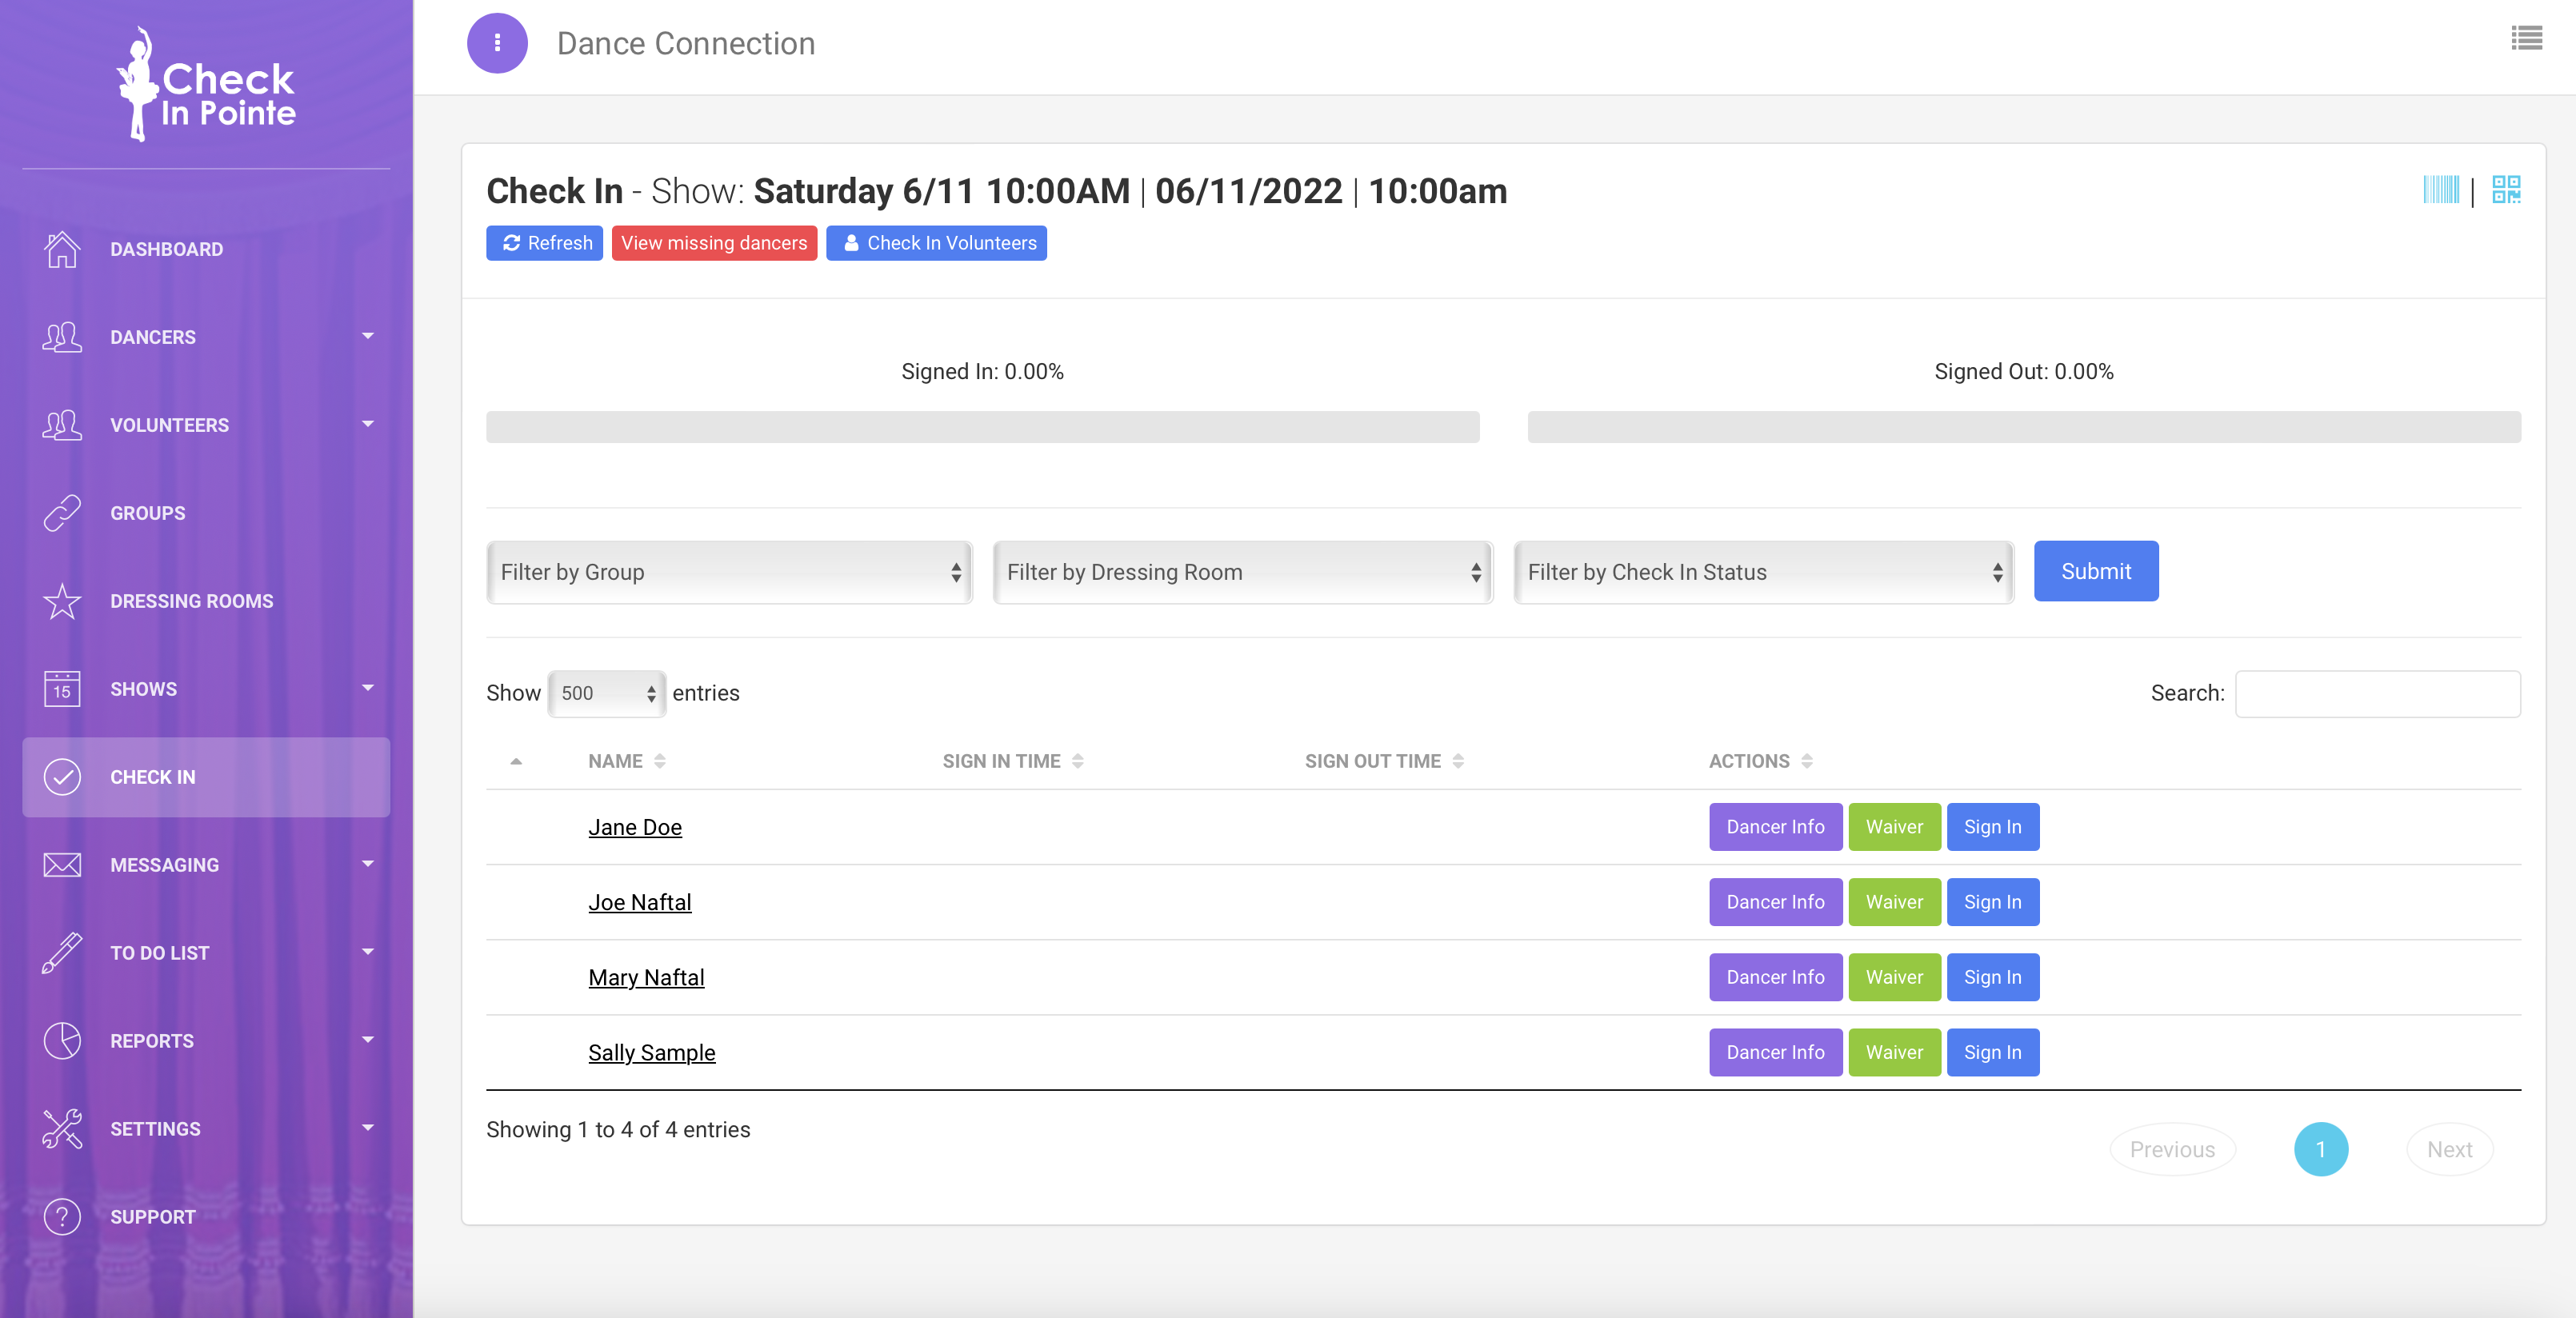
You will then see the check in page for the selected show.

At the top of the page you will see three buttons at the left:
- Refresh: This will refresh the page and show you the latest information. Remember, Check In Pointe is cloud based so you can check in on multiple devices. Use the refresh button to see the latest sync'd information from the cloud.
- View missing dancers: This will pop up a window showing you all dancers that haven't yet been signed in so you can track them down. There is a Sign In button in the pop in window to sign in a missing dancer.
- Check In Volunteers: This will switch your check-in view from dancers to volunteers and vice versa.
At the top of the page, you will see two light blue icons on the top right:
- Barcode Scanning: This will allow you to sign in dancers using a barcode scanner.
- QR code Scanning: This will allow you to sign in dancers using the device's camera to scan a QR code.
Under the top row, you will see two progress bars:
- Signed In %: This is the percentage of dancers that have been signed in.
- Signed In %: This is the percentage of dancers that have been signed in.
Under the progress bars, you will see options to filter your list:
- Filter by Group: This will filter down your list to a particular group. For example, if you see a specific costume walking in the door, you can filter down to that group to narrow your selection to that song.
- Filter by Dressing Room: This will filter down your list to a particular dressing room. For example, if you are stationed outside of Dressing Room B, you could filter down your list to only that dressing room so you're only checking in those dancers.
- Filter by Check In Status: This will filter down to a particular check in status, for example all dancers that have not yet been signed in, all dancers that have been signed in, or all dancers that have been signed out.
Under the filter options, is your main check in table with the following columns:
- Dancer Photo: If uploaded.
- Dancer Name
- Sign In Time: Most recent time the dancer was signed in
- Sign Out Time: Most recent time the dancer was signed out
- Dancer Info Button: Click the purple Dancer Info button to pop up a window with dancer information.
- Waiver Button: Click the green Waiver button to pop up a waiver for the parent to sign.
- Sign In: Click the blue sign in button to sign in a dancer. Once a dancer is signed in, the button will change to have an Undo Sign In button and a Sign Out button instead.
🔎 Above the check-in table on the right is a box to search for a dancer's name or nickname.
⏰ The sign in and sign out times will be based on the Time Zone selected on your Studio Profile page in Settings.
Row colors:
- The dancer's row will be white if they have yet to be signed into the show.
- The dancer's row will be yellow if they have been signed into the show.
The dancer's row will be orange if they have been signed out of the show.
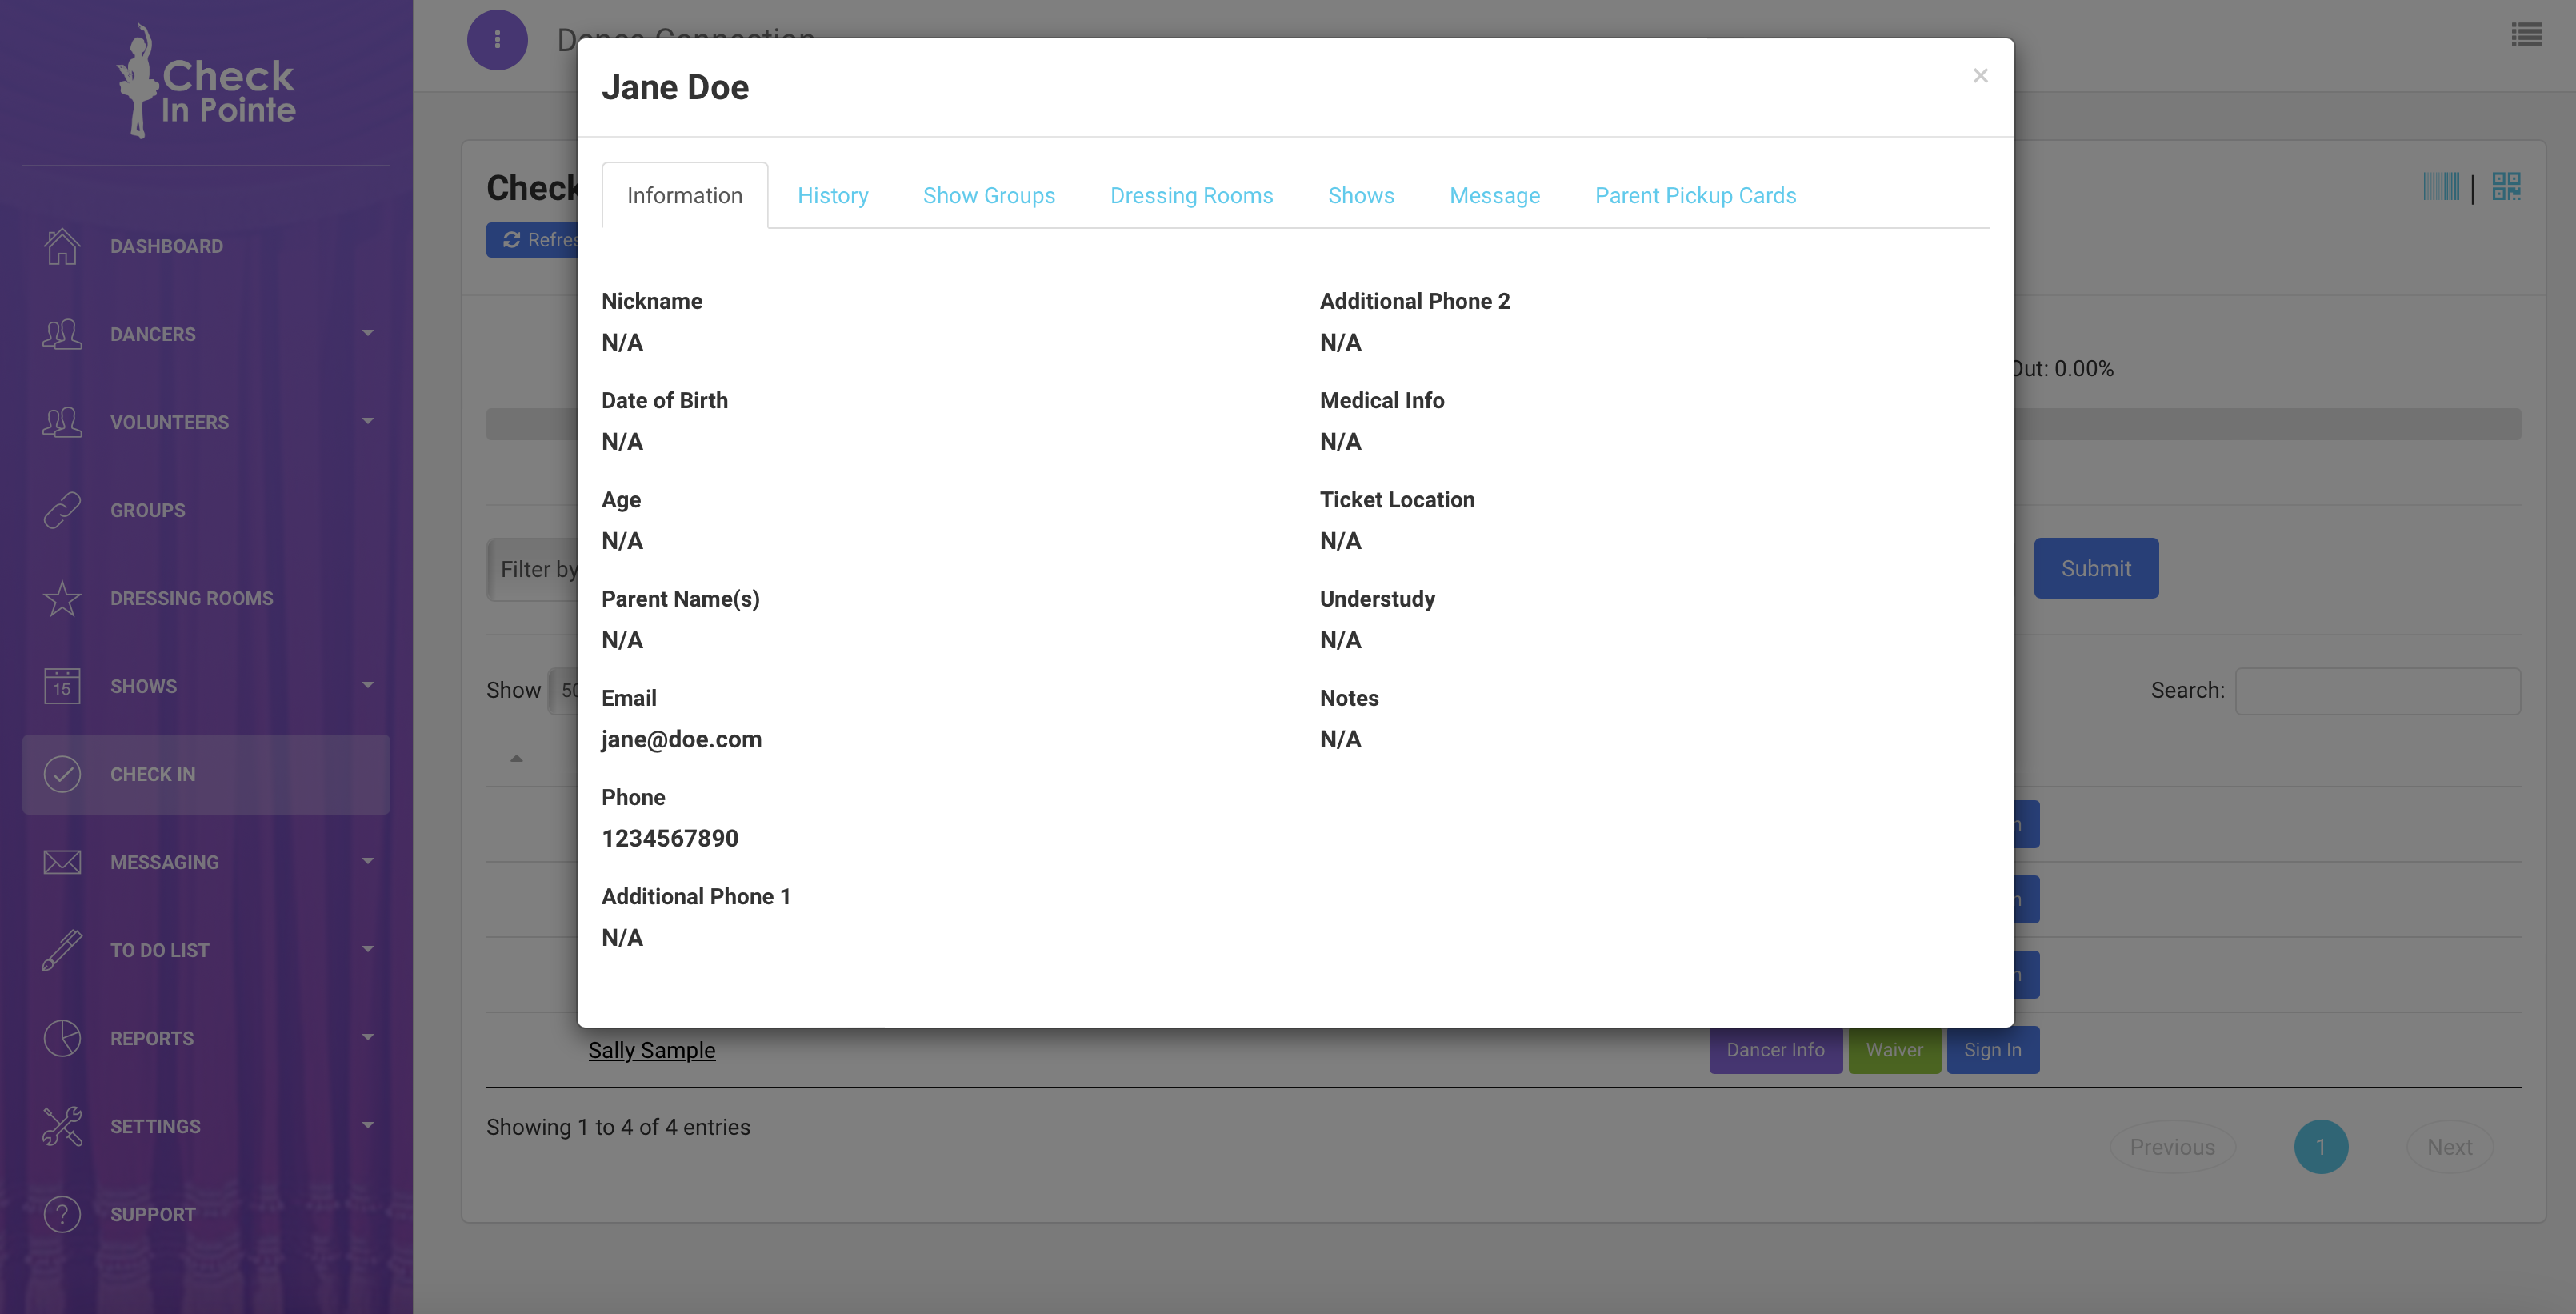
Dancer Info Window

The Dancer Info window will display tabs with the following information:
- Information: This shows the dancers basic information such as nickname, date of birth, contact information, parent names, medical information, ticket location, understudy, etc.
- History: This shows the dancer's sign in and sign out history.
- Show Groups: This shows the dancers schedule of groups for this show, in show order. It will show all of the dances they perform in this show, in the correct show order. IT will also show the group image (such as the costume photo). This is great for when a dancer comes off stage and doesn't know which of their dances is next.
- Dressing Rooms: This shows which dressing room(s) a dancer is assigned to.
- Shows: This shows which show(s) a dancer is assigned to.
- Message: This allows you to message this specific dancer's parents.
- Parent Pickup Cards: This shows any Parent Pickup IDs assigned to this dancer.
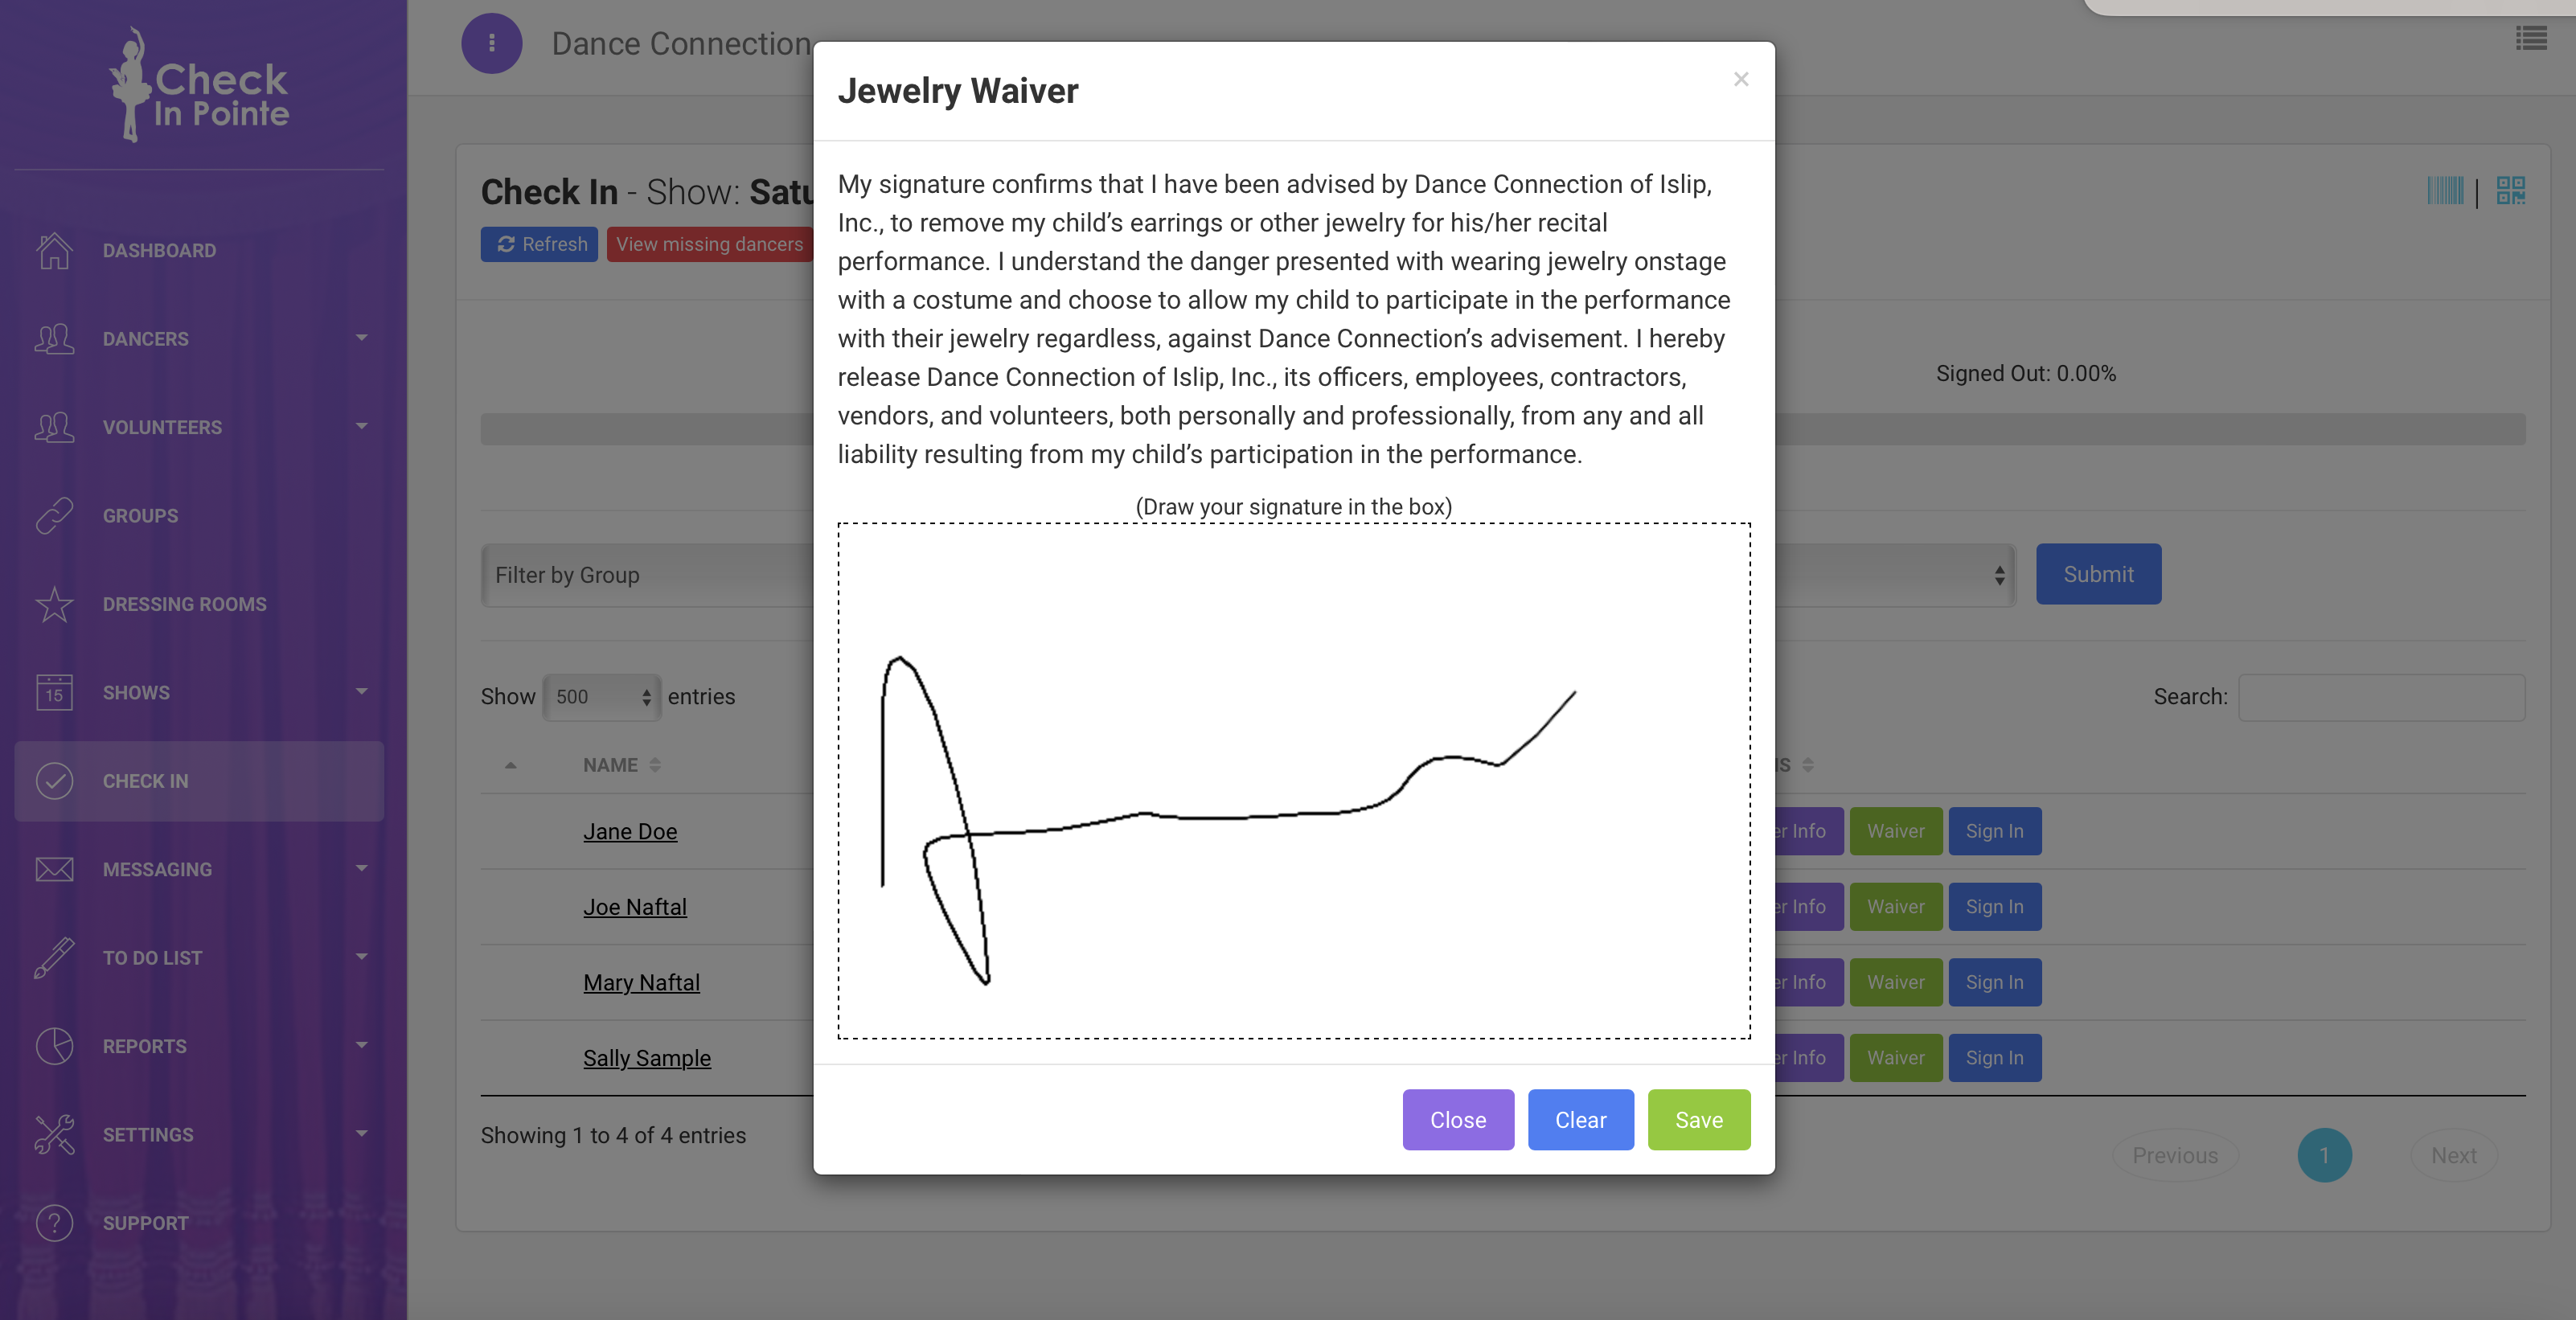
Waiver Window

The waiver screen shows the waiver text along with a box for the parent to sign on the device. Once submitted a copy of the waiver is emailed to the parent and then studio.

